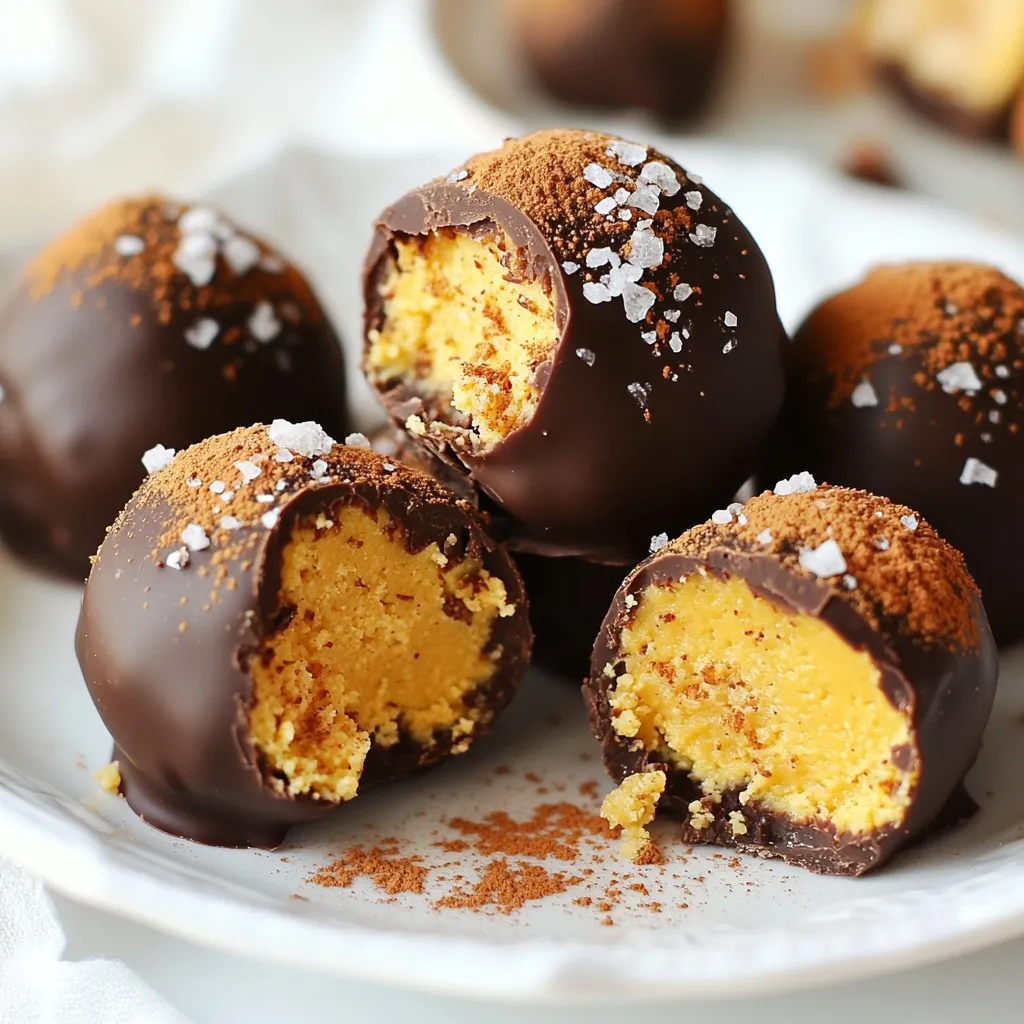
Fall is here, and it’s time to indulge in the cozy flavors of the season! These Pumpkin Cheesecake Truffles are a delightful mix of creamy, sweet, and spiced flavors that will hit all the right notes. With just a few simple ingredients, you can create a treat that impresses friends and family alike. Let’s dive into this fun recipe and make your autumn desserts unforgettable!
Why I Love This Recipe
- Perfect Fall Flavor: These truffles capture the essence of autumn with rich pumpkin and warm spices, making them a delightful treat for the season.
- Easy to Make: With simple ingredients and straightforward steps, this recipe is accessible for both novice and experienced bakers.
- Impressive Presentation: These truffles look elegant and sophisticated, perfect for sharing at gatherings or gifting to friends and family.
- Customizable Delight: Feel free to experiment with different coatings or toppings, allowing for a personalized twist on this classic treat.
Ingredients
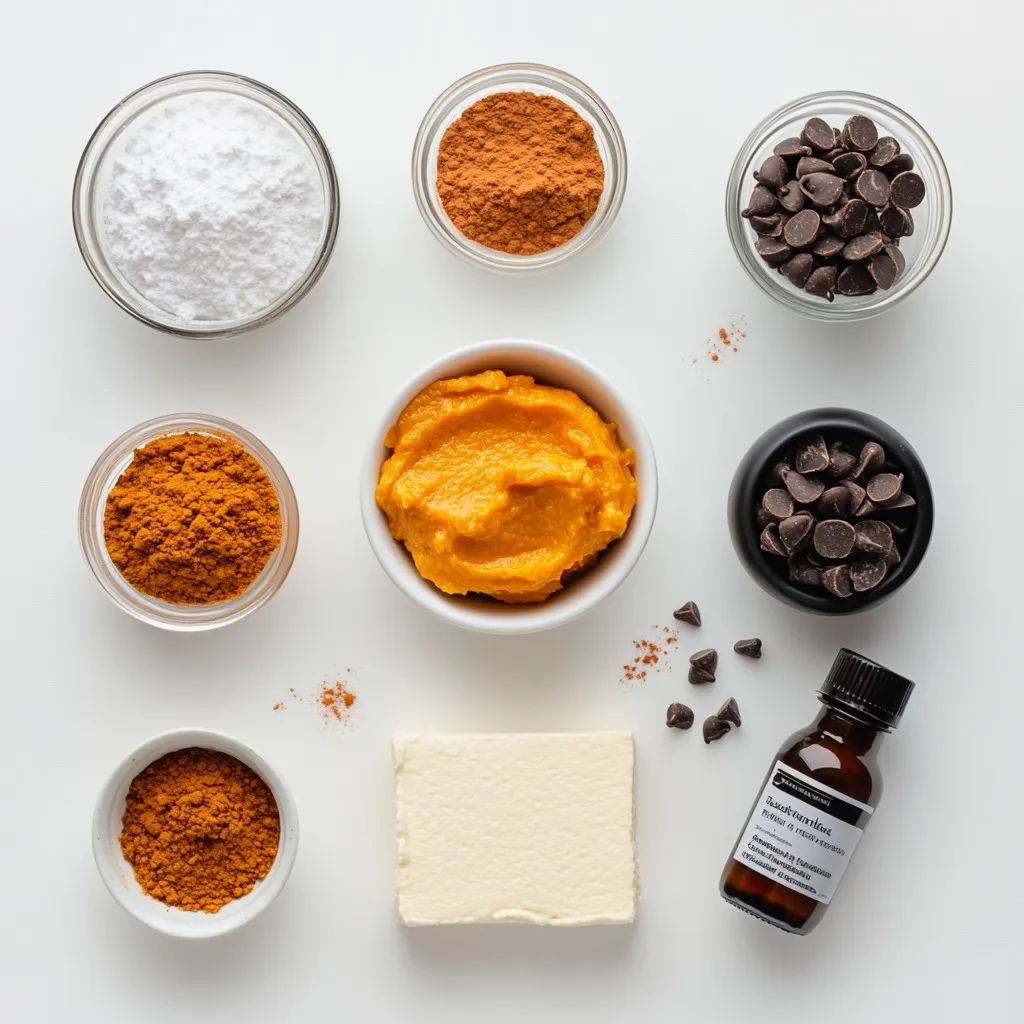
To make delicious pumpkin cheesecake truffles, you’ll need these simple ingredients:
– 8 oz cream cheese
– 1/2 cup pumpkin puree
– 1/2 cup powdered sugar
– 1 teaspoon pure vanilla extract
– 1 teaspoon pumpkin pie spice
– 1 1/2 cups graham cracker crumbs
– 8 oz dark chocolate chips
– Pinch of sea salt
– Optional garnishes: graham cracker crumbs, ground cinnamon
Each ingredient plays a key role in creating the flavor and texture of these truffles. The cream cheese gives a rich, creamy base, while the pumpkin puree adds that cozy fall flavor. The powdered sugar sweetens the mix, and the vanilla extract adds warmth. Pumpkin pie spice brings in that classic autumn taste with hints of cinnamon and nutmeg.
Graham cracker crumbs provide a nice crunch and balance out the creaminess. Meanwhile, dark chocolate chips coat the truffles, giving them a sweet and slightly bitter touch. The sea salt enhances all these flavors, making every bite truly irresistible. If you want to make the truffles even more special, consider garnishing with extra graham cracker crumbs or a sprinkle of cinnamon for that added flair.
Step-by-Step Instructions
Preparation Overview
Mixing the cream cheese and pumpkin is simple. Start with 8 oz of softened cream cheese. Add in 1/2 cup of pumpkin puree. Blend them together until smooth and creamy. This makes a rich base for your truffles.
Next, add the dry ingredients. Mix in 1/2 cup of powdered sugar, 1 teaspoon of vanilla extract, and 1 teaspoon of pumpkin pie spice. Stir until everything is fully combined. This step adds sweetness and flavor to your mixture.
Now it’s time to form the truffle balls. Use clean hands to scoop out portions of the mixture. Roll them into small balls, about 1 inch wide. Place the formed truffles on a tray lined with parchment paper. This makes them easy to chill.
Chilling and Coating
Chilling is very important. It helps the truffles hold their shape. Place the tray of truffles in the fridge for about 30 minutes. This step firms them up for coating.
While they chill, melt the chocolate. Take 8 oz of dark chocolate chips and put them in a microwave-safe bowl. Heat in 30-second bursts, stirring well each time. Continue until the chocolate is smooth and melted.
Now, dip and decorate the truffles. Take each chilled truffle and dip it into the melted chocolate. Use a fork to coat it completely. Let any excess chocolate drip off before placing it back on the tray. While the chocolate is still wet, add a pinch of sea salt to each truffle. You can also sprinkle extra graham cracker crumbs and ground cinnamon for a nice touch.
Finally, return the tray to the fridge. Let the chocolate set for about 20-30 minutes. Then, your pumpkin cheesecake truffles are ready to enjoy!
Tips & Tricks
Perfecting Your Truffles
– Achieving the right consistency: The mixture should be creamy and thick. When mixing, make sure you blend the cream cheese and pumpkin well. This will help the truffles hold their shape. If the mixture is too soft, add more graham cracker crumbs to firm it up.
– How to store while cooling: After rolling the truffles, place them on a parchment-lined tray. Chill them in the fridge for at least 30 minutes. This helps them firm up before coating. If you leave them out too long, they can become soft and hard to dip.
– Common mistakes to avoid: Don’t skip the chilling step. It is vital for a good coating. Also, ensure your chocolate is fully melted and smooth. If it’s too thick, your truffles won’t get a nice coat. Lastly, roll the truffles into even balls. This makes for a nicer look and easier dipping.
Flavor Enhancements
– Adding spices or flavor extracts: You can add a pinch of nutmeg or even a splash of maple extract for extra flavor. These spices enhance the fall vibe and make each bite special.
– Alternative coatings: While dark chocolate is classic, try using white chocolate for a different taste. You can also roll the truffles in crushed nuts or coconut flakes for added texture. Each coating gives a new twist to your truffles.
Pro Tips
- Chill for Perfect Shape: Make sure to chill the truffles for at least 30 minutes before coating them in chocolate. This will help them maintain their shape during the dipping process.
- Use Quality Chocolate: Choose high-quality dark chocolate for coating to elevate the overall flavor of your truffles. A good chocolate will melt smoothly and provide a rich taste contrast with the filling.
- Experiment with Spices: Don’t hesitate to adjust the amount of pumpkin pie spice to suit your taste. You could also try adding a dash of nutmeg or cloves for a deeper flavor profile.
- Garnish Creatively: Get creative with garnishes! Besides graham cracker crumbs and cinnamon, consider using crushed nuts or even a drizzle of white chocolate for added visual appeal and texture.
Variations
Alternative Ingredients
You can change up the pumpkin cheesecake truffles by trying different ingredients. Here are some fun ideas:
– Using white chocolate instead of dark: White chocolate gives a sweet twist. It pairs well with the pumpkin flavor. Melt it the same way as dark chocolate. The truffles will look beautiful and taste great.
– Adding nuts or other mix-ins: Chopped nuts add crunch. Walnuts or pecans work well. You can also mix in mini chocolate chips for extra sweetness. Just fold them in before forming the truffle balls.
– Gluten-free options: To make these truffles gluten-free, swap out the graham cracker crumbs. Look for gluten-free graham crackers or use crushed nuts instead. This keeps the flavor while catering to those with gluten concerns.
Seasonal Variations
You can make these truffles even more special by changing flavors for the season:
– Holiday-themed variations: For the holidays, add festive spices like nutmeg or cloves. You can also dip the truffles in colored chocolate for a fun look. This makes them perfect for gift-giving or holiday parties.
– Incorporating different fall flavors: Think about adding apple or caramel for a new taste. You can mix a bit of apple pie spice into the filling. This gives a fresh take on the classic truffle.
These variations make pumpkin cheesecake truffles a fun and flexible treat for fall!
Storage Info
Best Storage Practices
For storing pumpkin cheesecake truffles, use an airtight container. This keeps them fresh. You can store them in the fridge or freezer, depending on how long you want to keep them.
– Fridge: Place the truffles in a single layer in the container. This prevents them from sticking together. They will stay fresh for about five days.
– Freezer: For longer storage, freeze the truffles. Place them in a freezer-safe bag or container. They can last up to three months.
Shelf Life
So how long do truffles last? In the fridge, they last about five days. In the freezer, they last up to three months.
Watch for these signs of spoilage:
– A change in color or texture can mean they are no longer good.
– A sour smell is a clear sign to throw them away.
– If they feel sticky or slimy, do not eat them.
Storing truffles properly helps you enjoy them longer.
FAQs
Common Questions
Can I make pumpkin cheesecake truffles ahead of time?
Yes, you can make these truffles a day in advance. Simply follow the recipe and chill them. Place them in an airtight container in the fridge. This helps the flavors meld together.
Are these truffles gluten-free?
Yes, they can be gluten-free! Just use gluten-free graham cracker crumbs. Check the label to be sure.
Can I use homemade pumpkin puree?
Absolutely! Homemade pumpkin puree works great. Just make sure to drain it well so it isn’t too watery.
Troubleshooting
What if the chocolate doesn’t set?
If the chocolate doesn’t set, it may be too warm. Chill the truffles again for 10-15 minutes. This usually helps the chocolate firm up.
How to fix overly soft truffles?
If your truffles are too soft, add more graham cracker crumbs. Mix in a little at a time until the texture is right. Then, roll them into balls again before chilling.
You learned how to make pumpkin cheesecake truffles step-by-step. We covered the ingredients, from cream cheese to dark chocolate. Chilling truffles and coating them in chocolate are key steps. Remember the tips for perfecting your truffles and storage best practices. You can also try fun variations and flavors. These truffles offer a tasty treat for fall or any time. Enjoy making them and impress your friends and famil