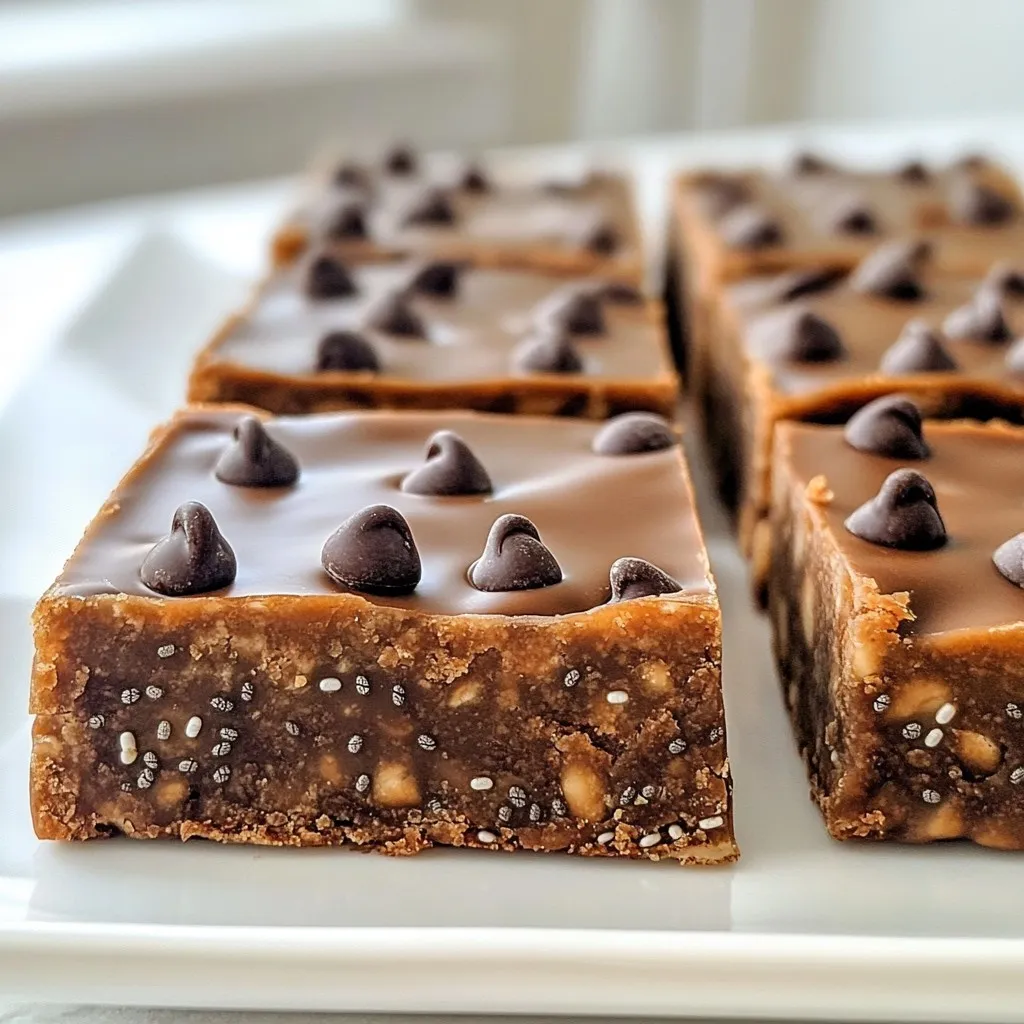
Are you ready to boost your energy levels with a delicious treat? My Peanut Butter Chocolate Energy Bars are the perfect snack for anyone needing a quick pick-me-up. Packed with wholesome ingredients and customizable to your taste, these bars will fuel your day. In this blog, I’ll guide you through the easy steps to create your own batch and share tips for making them just right. Let’s dive in!
Why I Love This Recipe
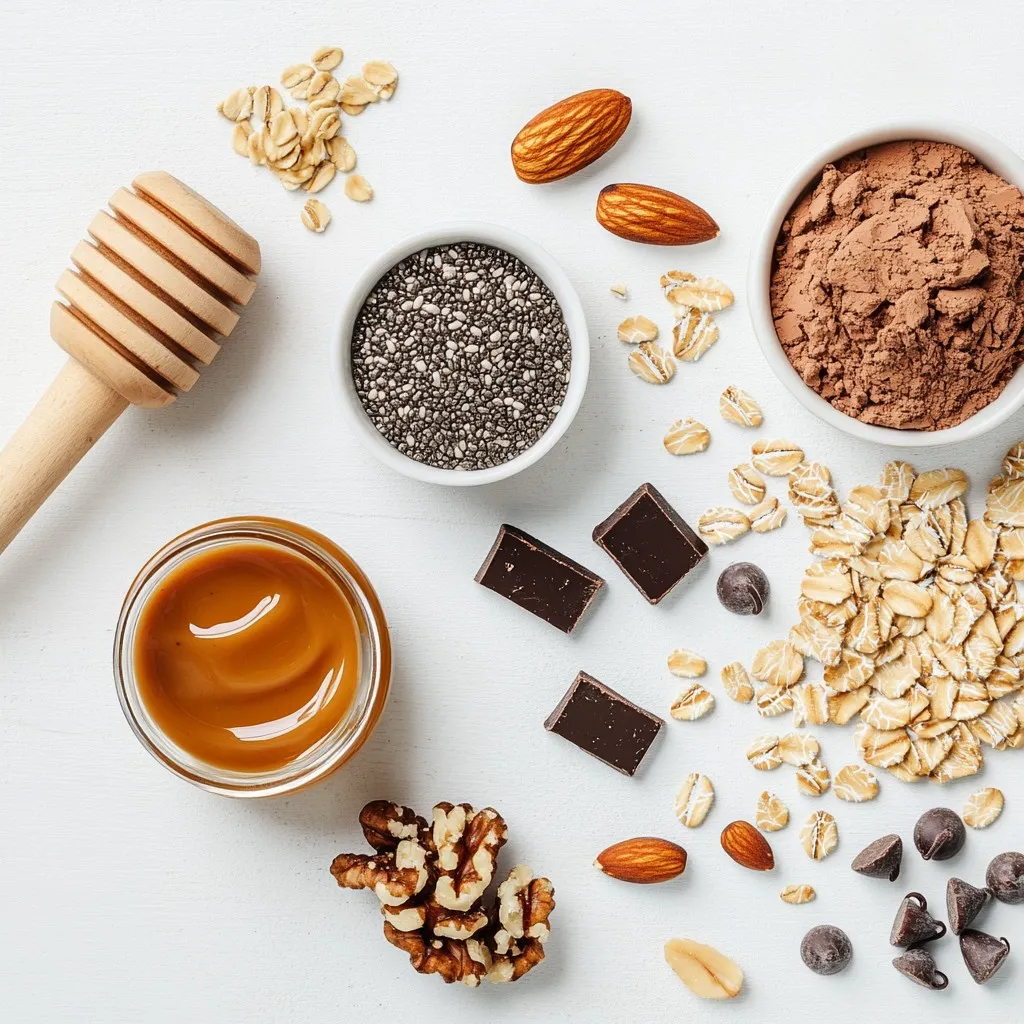
- Healthy Ingredients: Packed with rolled oats, chia seeds, and peanut butter, these bars offer a nutritious boost without sacrificing taste.
- Quick and Easy: With just 15 minutes of prep time, you can whip up a batch of these energy bars and store them for later!
- Customizable: Feel free to mix in your favorite nuts or seeds to make these bars uniquely yours.
- Perfect Anytime Snack: Whether it’s breakfast, a post-workout snack, or a healthy dessert, these bars fit any occasion.
Ingredients
Main Ingredients
– 1 cup rolled oats
– 1/2 cup creamy peanut butter (natural, unsweetened preferred)
– 1/3 cup honey or pure maple syrup
– 1/2 cup dark chocolate chips (semi-sweet or dairy-free)
– 1/4 cup chia seeds
– 1/4 cup unsweetened cocoa powder
– 1/4 teaspoon salt
– 1 teaspoon vanilla extract
These main ingredients create a delicious and energy-packed bar. The rolled oats provide fiber, while peanut butter adds protein and healthy fats. Honey or maple syrup gives sweetness, and dark chocolate chips bring rich flavor.
Optional Ingredients
– 1/4 cup chopped nuts (such as almonds, walnuts, or pecans)
Feel free to add nuts for extra crunch and nutrients. You can also include protein powder for an added boost. Other fun options are dried fruit or seeds, like pumpkin or sunflower seeds.
Ingredient Notes
When choosing ingredients, quality matters. Look for natural peanut butter without added sugar or oils. This ensures a rich, nutty flavor. For chocolate chips, choose dark or dairy-free options to keep it healthier. Fresh chia seeds and cocoa powder will give the best taste and texture. Always check the labels to avoid unwanted additives.
Step-by-Step Instructions
Preparation Steps
Start by gathering your dry ingredients. You need rolled oats, chia seeds, cocoa powder, and salt. In a large bowl, mix these together well. Make sure the dry ingredients are evenly spread. This step is key for a balanced flavor in each bite.
Melting the Peanut Butter Mixture
Next, take a small saucepan. Add creamy peanut butter and honey or maple syrup. Turn the heat to low and stir constantly. You want to melt everything until it is smooth. Avoid boiling the mixture, as that can change the texture. Once melted, remove it from heat and add the vanilla extract. Stir until well combined.
Combining and Setting
Now, pour your warm peanut butter mixture over the dry ingredients. It’s important to mix thoroughly with a spatula. Add dark chocolate chips and any nuts you chose. Keep mixing until every bit is coated. Line an 8×8-inch baking dish with parchment paper. Pour the mixture into the dish. Press it down firmly to make it compact. Cover with plastic wrap and refrigerate for at least 2 hours. This helps the bars set properly. After they firm up, lift them out using the parchment paper. Cut into squares or rectangles. Enjoy your tasty energy bars!
Tips & Tricks
Ensuring Perfect Texture
To get the right texture for your energy bars, follow these key steps:
– Use the right oats: Rolled oats work best. They hold shape and add chewiness.
– Press firmly: When you put the mixture in the baking dish, press it down well. This helps the bars hold together.
– Chill the mixture: Refrigerate the bars for at least two hours. This makes them firm and easy to cut.
– Cut wisely: Use a sharp knife to slice the bars after chilling. Clean cuts keep them looking nice.
Flavor Enhancements
You can easily boost the flavor of your energy bars. Here are some fun ideas:
– Add spices: Try cinnamon or nutmeg for warmth. Just a pinch can make a big difference.
– Use extracts: A splash of almond or coconut extract adds depth. It’s a simple way to mix things up.
– Include zest: Grating some orange or lemon zest gives a fresh kick. This brightens the flavor profile.
Serving Suggestions
These energy bars are great for many occasions. Here are some tasty ways to enjoy them:
– Breakfast on the go: Grab a bar as you rush out the door. It’s a quick and healthy start to your day.
– Pre-workout fuel: Eat one before your workout. It gives you lasting energy without weighing you down.
– Healthy dessert: Pair a bar with a cup of coffee. It makes a satisfying treat after dinner.
– Lunchbox snack: Pack a bar for your child’s lunch. They will love the taste, and it’s a good source of energy.
Pro Tips
- Chill for Best Texture: Allow the bars to chill in the refrigerator for at least 2 hours. This helps them firm up and makes for a better texture when you bite into them.
- Customize Your Add-ins: Feel free to add your favorite nuts, seeds, or dried fruits to the mixture for extra flavor and nutrition. Just be mindful of the balance of wet and dry ingredients.
- Use Parchment Paper: Line your baking dish with parchment paper for easy removal. The overhang will allow you to lift the bars out without them breaking apart.
- Store Properly: Keep the energy bars in an airtight container in the refrigerator to maintain freshness. They can last up to two weeks, but they might not last that long!
Variations
Flavor Variations
You can change the flavor of these energy bars easily. Try using almond butter instead of peanut butter for a nutty twist. For a tropical vibe, add shredded coconut. Mix in some vanilla protein powder for extra fuel. You can also swap dark chocolate chips for white chocolate or butterscotch. Each option gives a fresh taste.
Dietary Modifications
Want these bars to be vegan? Just use maple syrup instead of honey. You can also choose dairy-free chocolate chips. For a gluten-free option, stick to certified gluten-free oats. This way, everyone can enjoy these tasty bars without worry.
Add-Ins and Mix-Ins
Get creative with your bars by adding fun mix-ins. Chopped dried fruits like apricots or cranberries add sweetness. You can toss in seeds like pumpkin or sunflower for crunch. Add a handful of mini marshmallows for a treat. You can customize your bars to match your taste perfectly!
Storage Info
Best Storage Practices
To keep your peanut butter chocolate energy bars fresh, store them in an airtight container. I prefer using a glass or plastic container with a tight lid. This helps prevent moisture from affecting the bars. You can also wrap each bar in parchment paper for easy grab-and-go snacks. Be sure to keep them away from heat or direct sunlight, as this can cause them to spoil faster.
Shelf Life
When stored in the refrigerator, these energy bars can last up to two weeks. If you want to keep them longer, you can freeze them. In the freezer, they can last for about three months. Just make sure to wrap them well to avoid freezer burn. When you’re ready to eat one, let it thaw in the fridge or at room temperature.
Tips for Reheating
You can enjoy these energy bars cold, but if you want a warm treat, feel free to heat them. Place one bar on a microwave-safe plate and warm it for about 10-15 seconds. Check it often to avoid overheating. You can also crumble them over yogurt or oatmeal for a warm breakfast or snack.
FAQs
Can I use different sweeteners?
Yes, you can use other sweeteners. Brown rice syrup or agave syrup work well. You might also try coconut sugar, but it will change the taste. Each sweetener has its own flavor. Adjust the amount based on your taste. Always keep in mind that using a liquid sweetener helps bind the bars together.
How do I know when the bars are set?
You can check the firmness by pressing down on the bars. If they feel firm and hold their shape, they are ready. They should not be too soft. After chilling for at least two hours, take them out of the fridge. If they stick to your fingers, they need more time. Once firm, cut them into your desired shape.
Are peanut butter chocolate energy bars healthy?
Yes, these bars are healthy! They have a great mix of nutrients. Rolled oats provide fiber, which helps digestion. Peanut butter adds protein and healthy fats. Chia seeds give omega-3s and more fiber. Dark chocolate adds antioxidants, making them tasty and good for you. Enjoy these bars for a quick snack or energy boost!
To sum up, making Peanut Butter Chocolate Energy Bars is simple and fun. You learned about key ingredients, steps to prepare, and tips for ideal texture. You can customize flavors and adaptations based on your needs. Remember, quality ingredients can make a big difference. With proper storage, these bars stay fresh and ready to fuel your day. Enjoy experimenting with flavors and serving ideas, and feel free to get creative. These bars are not just delicious, but also a healthy snack option that you can feel good abou