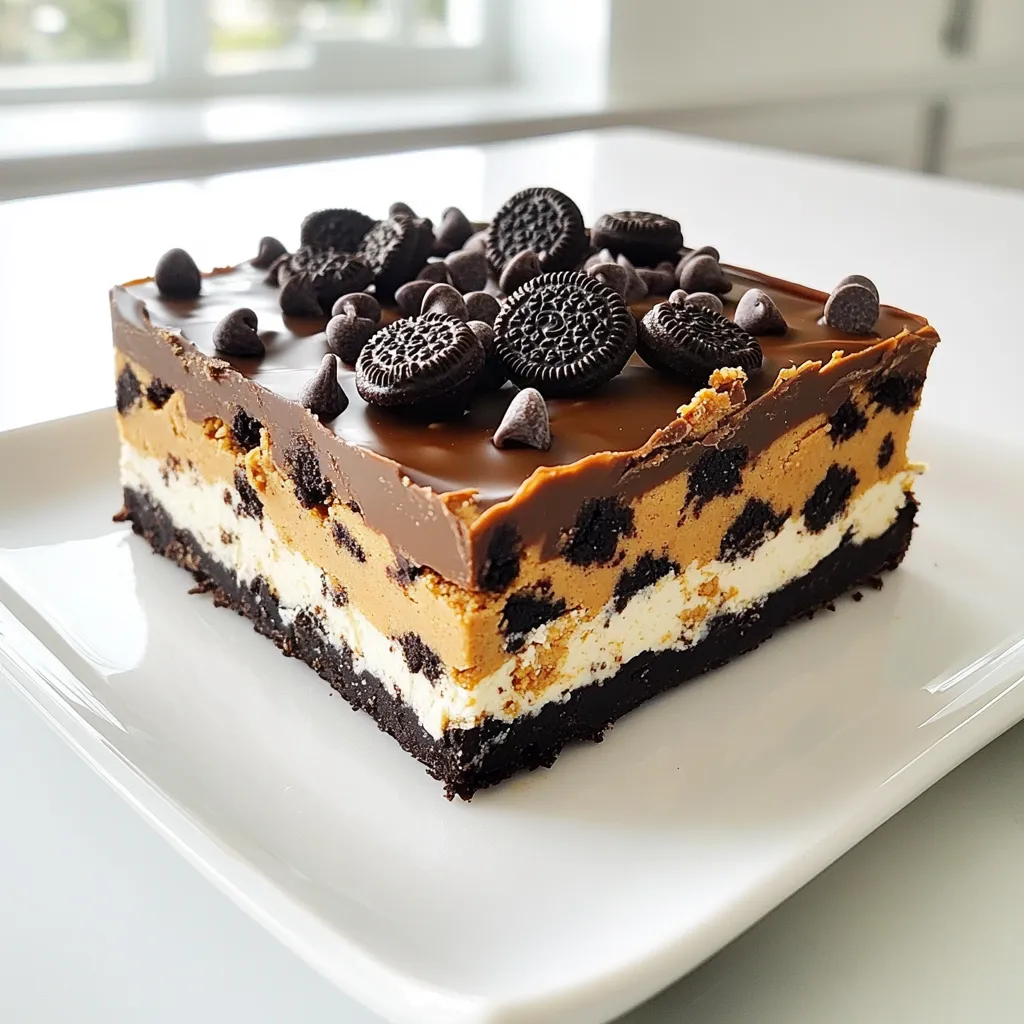
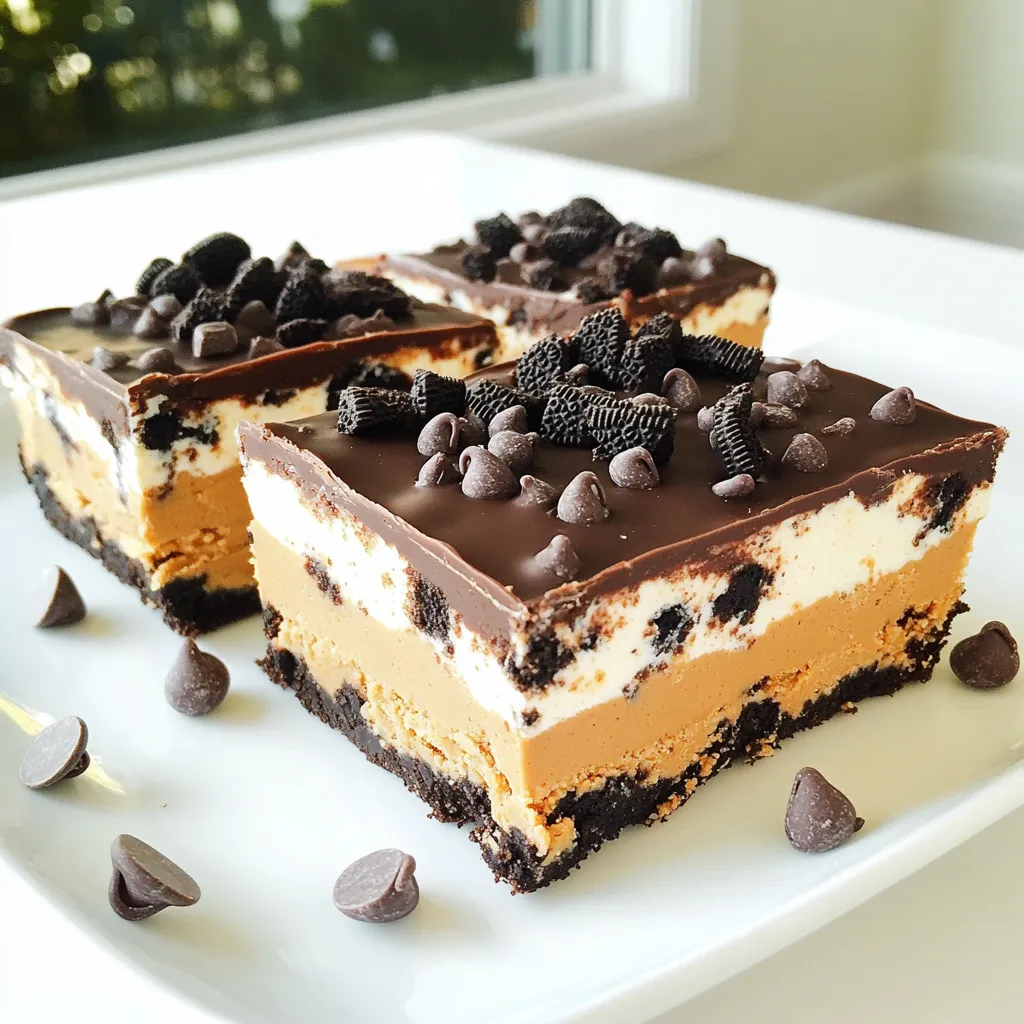
If you love quick and tasty treats, then you’ve got to try these No Bake Oreo Peanut Butter Bars! They mix creamy peanut butter, rich cream cheese, and crunchy Oreo cookies for a mouthwatering dessert. This recipe is simple enough for anyone to follow. Plus, it requires no oven! Let’s dive in and make a delicious snack that everyone will love. Trust me, you won’t regret it!
Ingredients
List of Ingredients
– 20 Oreo cookies, finely crushed
– 1 cup creamy or crunchy peanut butter
– 1/2 cup cream cheese, softened
– 1/2 cup powdered sugar
– 1 cup graham cracker crumbs
– 1 cup semi-sweet or dark chocolate chips
– 1 tablespoon coconut oil for melting chocolate
Ingredient Substitutions
You can swap peanut butter for almond butter or sunflower seed butter. These options work well too. If you want a vegan version, use a plant-based cream cheese. You can find this at most grocery stores. For a gluten-free treat, use gluten-free Oreos or any similar cookie. This keeps the bars tasty and suitable for everyone!
Step-by-Step Instructions
Preparation Steps
1. Start by taking your 20 finely crushed Oreo cookies.
2. In a large mixing bowl, add the crushed cookies with 1 cup of peanut butter.
3. Mix them together until the blend is creamy and smooth.
4. Next, add 1/2 cup of softened cream cheese and 1/2 cup of powdered sugar.
5. Stir well to remove all lumps and ensure a smooth texture.
6. Slowly incorporate 1 cup of graham cracker crumbs into the mix.
7. Keep stirring until the mixture is thick and cohesive.
Assembling the Bars
1. Grab an 8×8 inch baking pan and line it with parchment paper.
2. Leave some extra paper on the sides for easy lifting later.
3. Pour your Oreo-peanut butter mix into this pan.
4. Use a spatula or your hands to press it down firmly.
5. Aim for an even layer across the bottom of the pan.
Melting and Adding Chocolate
1. Take a small microwave-safe bowl and add 1 cup of chocolate chips.
2. Add 1 tablespoon of coconut oil to the bowl.
3. Heat this mixture in the microwave for 30 seconds.
4. Stir the mix, then heat for another 30 seconds.
5. Keep stirring until the chocolate is completely melted and smooth.
6. Pour the melted chocolate over the pressed layer in the pan.
7. Use a spatula to spread the chocolate evenly across the surface.
8. Place the pan in the fridge and chill for at least 2 hours.
9. Once firm, lift the bars out using the parchment.
10. Cut into squares or bars as you like.
Tips & Tricks
Ensuring The Best Texture
To get the right texture, mix the crushed Oreo cookies and peanut butter well. This blend should be creamy and thick. If it feels too dry, add a bit more peanut butter. For cutting the bars cleanly, chill them for a full two hours. Use a sharp knife for slicing. Wipe the knife with a paper towel between cuts to keep the edges neat.
Enhancing Flavor
You can add flavor by mixing in a teaspoon of vanilla extract. This small step makes a big difference in taste. For a pretty finish, garnish the bars with crushed Oreos or a sprinkle of chocolate chips on top. This adds a nice touch and makes them look fancy.
Common Mistakes to Avoid
A common mistake is making the bars too crumbly. This happens if you don’t mix the ingredients well. Make sure you blend everything until smooth. Also, to ensure the chocolate layer sets properly, let it cool at room temperature before chilling. This helps the chocolate harden without being too soft.
Variations
Flavor Combinations
You can take these bars to the next level with fun flavor twists.
– Sea Salt: Sprinkle a little sea salt on top of the chocolate layer. This adds a nice contrast to the sweet taste.
– Caramel: Drizzle melted caramel over the chocolate for a rich, gooey touch. This makes each bite even more delicious.
– Nuts: Add chopped nuts like peanuts or almonds to the mixture. This gives your bars a nice crunch and extra flavor.
– Other Cookies: Swap some Oreos for other cookies, like chocolate sandwich cookies or vanilla ones. This creates new taste experiences.
Dietary Modifications
You can easily adjust this recipe to fit different diets.
– Sugar-Free: Use sugar-free peanut butter and powdered sugar. This way, you can enjoy the bars without the extra sugar.
– Dairy-Free: Substitute cream cheese with a dairy-free option. Look for vegan cream cheese in stores.
– Nut-Free: For a nut-free version, replace peanut butter with sun butter. It has a similar texture and taste.
These variations let you customize the bars to your liking and dietary needs. Enjoy experimenting!
Storage Info
Best Practices for Storing Bars
To keep your No Bake Oreo Peanut Butter Bars fresh, use an airtight container. A glass or plastic container works great. You can also wrap the bars tightly in plastic wrap before placing them in the container. Store them in the fridge for the best taste and texture.
These bars last about one week in the fridge. After that, they may lose some flavor and texture. If you want to enjoy them longer, consider freezing them.
Freezing Instructions
Freezing is a smart way to save your bars for later. To freeze, cut the bars into squares and place them in a single layer on a baking sheet. This step prevents them from sticking together. Once frozen, transfer the bars into a freezer-safe bag or container. Be sure to remove as much air as possible to avoid freezer burn.
For the best quality, thaw the bars overnight in the fridge before serving. This helps them regain their creamy texture. Enjoy them chilled or at room temperature for a tasty treat!
FAQs
How long do No Bake Oreo Peanut Butter Bars last?
No Bake Oreo Peanut Butter Bars last about one week in the fridge. Store them in an airtight container. This keeps them fresh and tasty. If you want them to last longer, you can freeze them. They freeze well for up to three months. Just thaw them in the fridge before you enjoy them.
Can I use crunchy peanut butter instead of creamy?
Yes, you can use crunchy peanut butter. This change adds texture to the bars. The crunchy bits give a nice contrast to the smooth filling. The flavor stays rich and delicious. Just keep in mind that the bars may be a bit less creamy.
What can I substitute for Oreos in the recipe?
If you don’t have Oreos, try these alternatives:
– Chocolate sandwich cookies: They give a similar taste.
– Graham crackers: Use crushed graham crackers for a different flavor.
– Peanut butter cookies: For a nutty twist.
– Vanilla wafers: They add a sweet, light taste.
Feel free to mix and match!
This recipe for No Bake Oreo Peanut Butter Bars is simple and fun. You learned about the key ingredients and how to swap them for your needs. The steps to mix, assemble, and melt chocolate create a tasty treat. I shared helpful tips to avoid mistakes and ensure the best flavor. Lastly, I covered storage options to keep your bars fresh. Enjoy making your own bars with different flavors. Get creative and share these delicious treats with others!