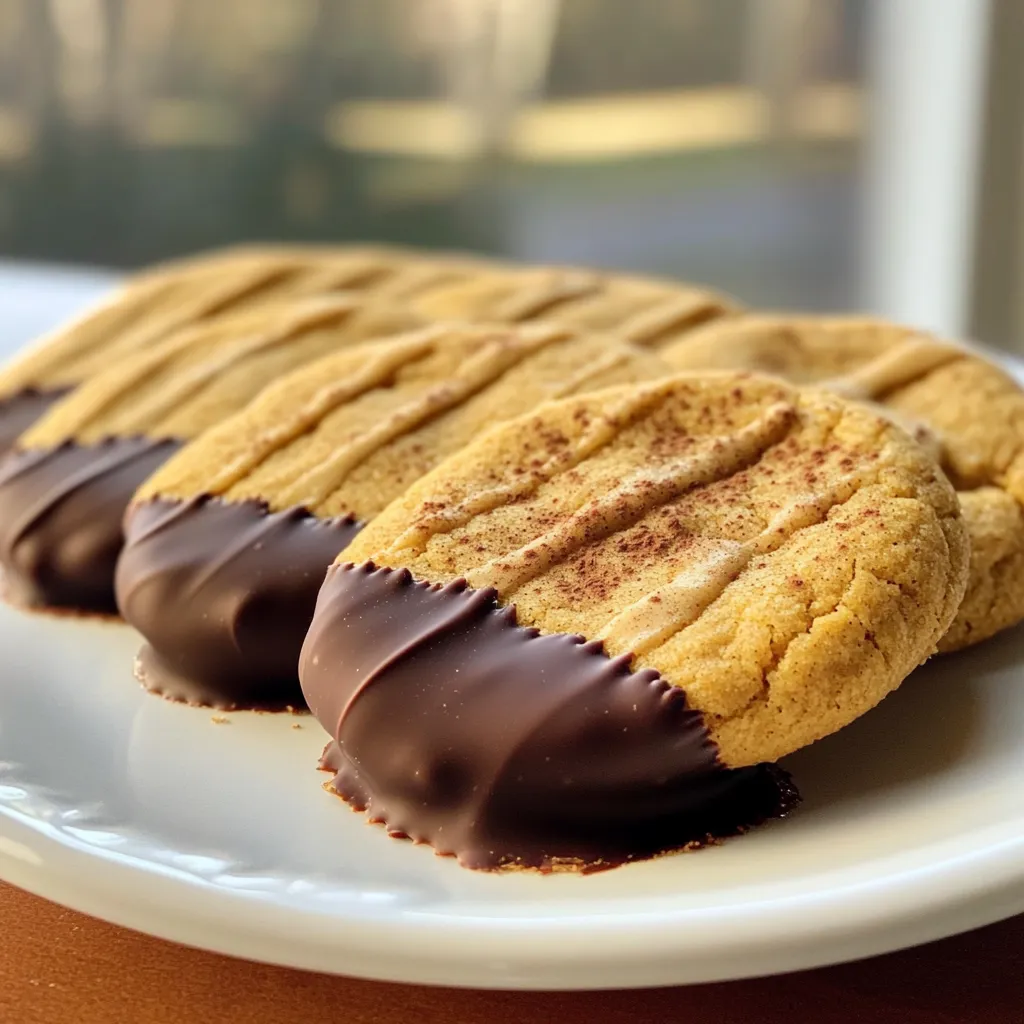
Get ready to enjoy the ultimate fall treat: Chocolate Dipped Pumpkin Spice Cookies! These cookies combine rich pumpkin flavor with a layer of sweet chocolate. They’ll fill your kitchen with warm, cozy scents that make you feel right at home. Whether you’re baking for a party or just for yourself, these cookies are sure to delight everyone. Let’s dive in and bake a batch of these tasty treats together!
Ingredients
To make these delightful cookies, gather these simple ingredients:
– 1 cup canned pumpkin puree
– 1/2 cup unsalted butter, softened
– 1 cup packed brown sugar
– 1/2 cup granulated sugar
– 1 large egg
– 2 teaspoons pure vanilla extract
– 3 cups all-purpose flour
– 1 teaspoon baking soda
– 1 teaspoon baking powder
– 2 teaspoons pumpkin pie spice
– 1/2 teaspoon salt
– 1 cup semi-sweet chocolate chips
– 2 tablespoons coconut oil
Each ingredient plays a key role. The pumpkin puree adds moisture and flavor. Unsalted butter gives a rich taste. Brown sugar brings sweetness and a hint of caramel. Granulated sugar adds more sweetness and helps with the cookie’s texture.
Eggs act as a binder, holding everything together. Vanilla extract adds a lovely aroma. The flour creates the cookie structure. Baking soda and baking powder help the cookies rise. Pumpkin pie spice gives that warm, cozy flavor. Salt balances all the sweetness.
The chocolate chips add a sweet finish. Coconut oil helps the chocolate melt smoothly. With these ingredients, you can create cookies that are soft, chewy, and full of flavor.
Step-by-Step Instructions
Preheating and Preparing the Baking Sheet
First, preheat your oven to 350°F (175°C). This step warms your oven so the cookies bake evenly. Line a baking sheet with parchment paper. This helps cookies come off easily after baking.
Mixing Wet Ingredients
In a large bowl, combine softened butter, brown sugar, and granulated sugar. Use an electric mixer to beat these until light and fluffy. This usually takes about 3 to 5 minutes. Next, add pumpkin puree, egg, and vanilla extract. Mix until smooth and well combined.
Combining Dry Ingredients
In another bowl, sift together flour, baking soda, baking powder, pumpkin pie spice, and salt. Sifting helps to blend the dry ingredients evenly. This step is key to avoiding lumps in the dough.
Mixing Your Dough
Now, gradually add the dry mix to the wet mix. Make sure to mix on low speed. Stop mixing when the dough just comes together. A few flour streaks are okay. Overmixing can make the cookies tough.
Baking the Cookies
Using a tablespoon or cookie scoop, drop dough onto the baking sheet. Space them about 2 inches apart. Bake for 10 to 12 minutes until the edges are lightly golden. Let the cookies cool on the sheet for about 5 minutes. Then, move them to a wire rack to cool completely.
Melting Chocolate for Dipping
Once your cookies are cool, melt the chocolate chips and coconut oil. Use a microwave-safe bowl for this. Heat in 30-second bursts, stirring in between. Keep heating until the mixture is smooth.
Dipping and Setting the Cookies
Dip the edge of each cookie into the melted chocolate. Let any extra chocolate drip back into the bowl. This way, you get just the right amount of chocolate. Place the dipped cookies on another sheet of parchment paper to set. You can speed this up by chilling them in the fridge for a few minutes.
Tips & Tricks
How to Achieve the Perfect Cookie Texture
To get soft and chewy cookies, use room temperature butter. Cream it well with sugars until fluffy. Mix the wet and dry ingredients gently. Overmixing can make cookies tough. Bake them until the edges turn golden. This ensures a soft center. Let them cool on the sheet for a bit, then move them to a rack. This helps maintain their texture.
Storage Tips for Freshness
To keep your cookies fresh, store them in an airtight container. This prevents them from drying out. Place parchment paper between layers to keep them from sticking. For longer storage, freeze them. Wrap each cookie in plastic wrap and place them in a freezer bag. They can stay fresh for up to three months. When ready, just let them thaw at room temperature.
Presentation Ideas for Serving
Make your cookies look great on a platter. Arrange them neatly for a fun display. Consider sprinkling a little pumpkin pie spice on top for flair. Crushed nuts can add a nice touch too. For an added festive feel, use seasonal decorations. This makes your cookies even more inviting for guests. Enjoy your delightful treats!
Variations
Alternative Toppings for Chocolate Dipping
You can change up your chocolate dip. Try white chocolate for a sweet twist. Melt it just like the semi-sweet chocolate. Drizzle it on top for a pretty look. You could also use dark chocolate for a rich flavor. Add sprinkles or crushed candy canes for fun colors and crunch.
Substitutions for Dietary Needs
If you need to make changes, it is easy. Use dairy-free butter and chocolate chips for a vegan option. Swap the all-purpose flour for gluten-free flour to meet gluten needs. You can also use maple syrup instead of brown sugar for a different taste.
Different Flavor Combinations
Mix it up with flavors! Add a bit of orange zest for a fresh pop. Try almond extract instead of vanilla for a nutty taste. You can also add a pinch of cayenne for heat. This gives the cookie a fun kick! Each choice makes the cookie special and unique.
Storage Info
How to Store Leftover Cookies
To keep your cookies fresh, place them in an airtight container. Layer parchment paper between cookies to prevent sticking. Store them at room temperature for up to one week. For longer freshness, you can refrigerate them. Just remember to let them come to room temperature before eating.
Freezing Cookies for Later Use
Freezing cookies is simple and great for long-term storage. First, let the cookies cool completely. Then, place them in a single layer on a baking sheet. Freeze for about one hour until solid. After that, transfer the cookies into freezer bags or airtight containers. They will stay fresh for up to three months. When you want one, just take it out and let it thaw.
Best Practices for Reheating Cookies
If you want to enjoy warm cookies again, reheating is easy. Preheat your oven to 350°F (175°C). Place the cookies on a baking sheet. Heat them for about 5-10 minutes. This warms them up and refreshes the texture. You can also use the microwave for quick reheating. Just heat for 10-15 seconds. Enjoy them warm for the best taste!
FAQs
How can I make these cookies gluten-free?
You can make these cookies gluten-free by using a gluten-free flour blend. Look for one that has a good mix of flours and starches. You can also add a bit of xanthan gum if your blend doesn’t include it. This helps give the cookies the right texture. Just swap the all-purpose flour for your gluten-free option in the recipe.
Can I use milk chocolate instead of semi-sweet?
Yes, you can use milk chocolate. It will give the cookies a sweeter taste. Just remember, milk chocolate has a different melting point than semi-sweet chocolate. Keep an eye on it while melting to avoid burning. The creamy flavor will pair well with the spices too.
What’s the best way to melt chocolate?
The best way to melt chocolate is in a microwave. Use a microwave-safe bowl and heat it in 30-second bursts. Stir after each interval until smooth. You can also use a double boiler on the stove. Just be careful not to get any water in the chocolate, as it can seize up.
How do I know when the cookies are done baking?
You know the cookies are done when the edges turn a light golden color. They may look soft in the center but will firm up as they cool. Keep an eye on them around the 10-minute mark. Every oven is different, so check them early to avoid overbaking.
Can I add nuts or other add-ins to the dough?
Yes, you can add nuts like walnuts or pecans to the dough. They add a nice crunch and flavor. You can also mix in chocolate chunks or dried fruit for extra taste. Just make sure to adjust the amount of flour slightly if you add a lot of extras. Enjoy experimenting!
This blog post guides you through making delicious pumpkin cookies. You learned about the key ingredients, detailed steps, and tips for perfect cookies. I shared ways to customize your cookies, store them, and even answered common questions.
Now, you can bake these treats with confidence. Enjoy experimenting with different flavors and toppings. Your friends and family will love your pumpkin cookies, and they’ll ask for more! Happy baking!