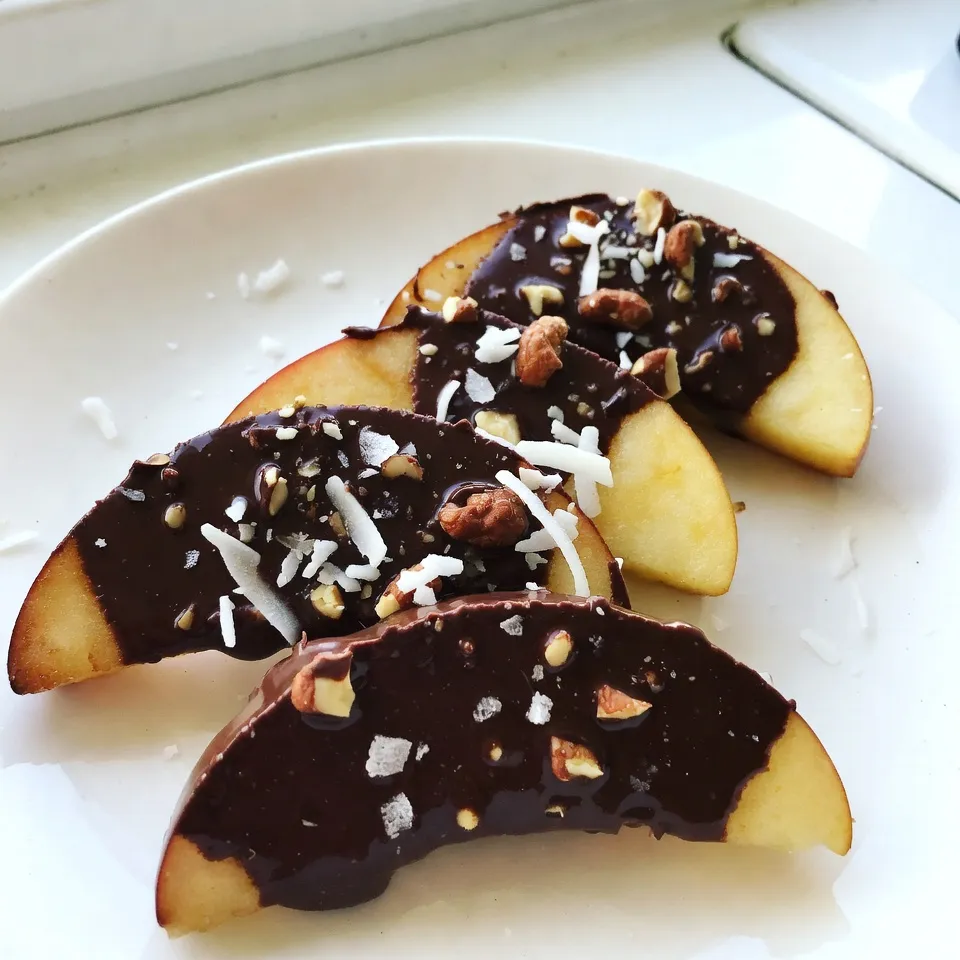
Get ready to treat yourself to a fun and tasty snack! Chocolate-covered apple slices combine sweet and crunchy goodness that anyone can enjoy. In this simple recipe, I’ll guide you through the easy steps to create these delightful bites. You’ll learn how to choose the best apples, melt chocolate perfectly, and add exciting toppings. Let’s get started on this delicious adventure that’s perfect for all ages!
Why I Love This Recipe
- Healthy Indulgence: This recipe combines the sweetness of apples with rich dark chocolate, making it a guilt-free treat.
- Customizable Toppings: You can personalize the apple slices with your favorite nuts and coconut, adding texture and flavor variations.
- Quick and Easy: With just 15 minutes of prep time, this recipe is perfect for a last-minute dessert or snack.
- Visually Stunning: The contrast of chocolate against the vibrant apple colors makes for an eye-catching presentation.
Ingredients
List of Ingredients
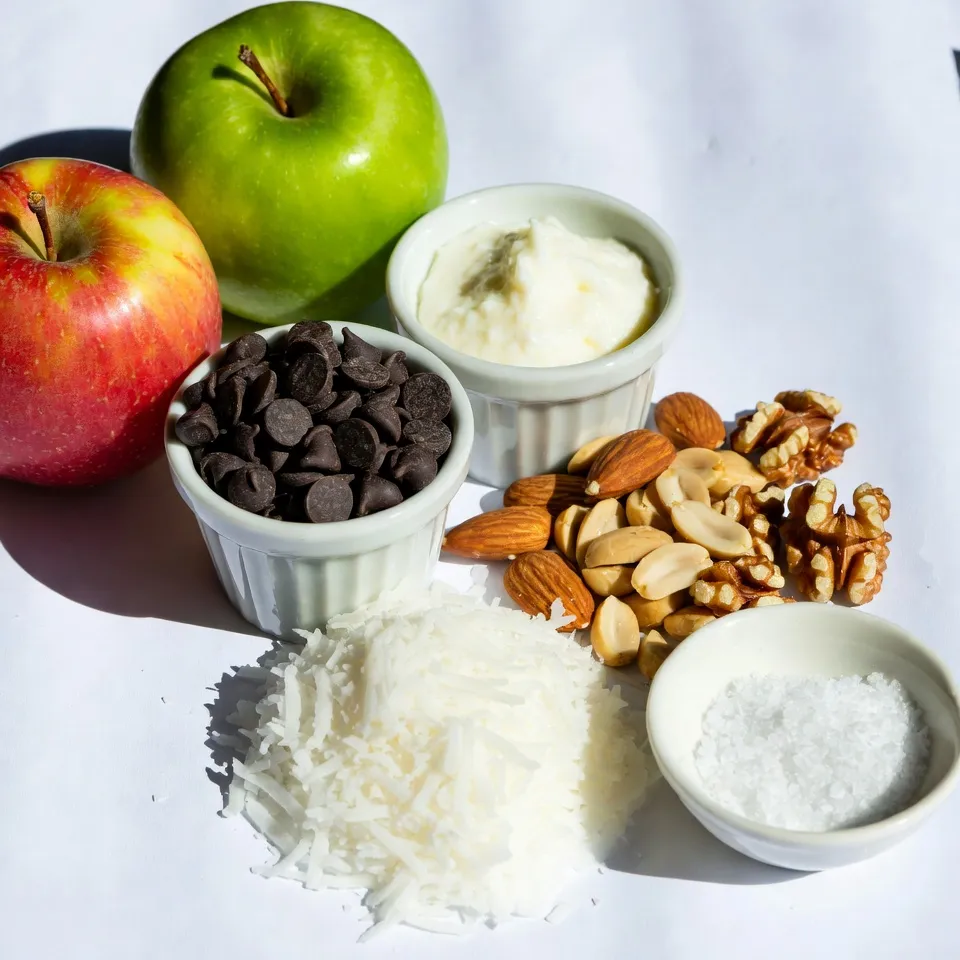
– 2 large apples (like Granny Smith or Fuji)
– 1 cup dark chocolate chips (or vegan chocolate chips)
– 1 tablespoon coconut oil
– 1/2 cup chopped nuts (almonds, peanuts, or walnuts)
– 1/4 cup unsweetened shredded coconut
– Sea salt (a pinch for garnish)
Choosing the Right Apples
Selecting the right apples is key for this recipe. I love using Granny Smith apples for their tart flavor. Fuji apples are also great because they are sweet and crunchy. Both types hold up well when dipped in chocolate. You want apples that are fresh and firm. Look for bright colors and a smooth skin. Avoid any that feel soft or have bruises.
Optional Garnish Ingredients
Garnishes can add both flavor and crunch. I recommend chopped nuts for a nice texture. Almonds, peanuts, or walnuts work well. You might also try unsweetened shredded coconut for a tropical twist. A pinch of sea salt on top enhances the flavor. Feel free to get creative with your toppings!
Step-by-Step Instructions
Washing and Preparing the Apples
Start by washing your apples. Use cool water to remove any wax or dirt. This step is key for a clean taste. Once washed, dry them well with a clean towel. Next, slice each apple into wedges that are about 1/4-inch thick. Make sure to avoid seeds and keep the skin on. The skin gives a nice texture and adds nutrients.
Melting the Chocolate
Grab a microwave-safe bowl and add 1 cup of dark chocolate chips. Add 1 tablespoon of coconut oil to make the chocolate smooth. Microwave the bowl in 30-second bursts. Stir the chocolate after each 30 seconds. Keep an eye on it to avoid burning. You want a nice, smooth chocolate that is easy to dip.
Dipping and Decorating the Apple Slices
Prepare a baking sheet by lining it with parchment paper. This will help the chocolate not stick. Next, take each apple slice and dip it into the melted chocolate. Make sure to coat both sides well. Let any extra chocolate drip back into the bowl. Place the coated apple slice on the baking sheet. Don’t forget to leave space between each slice. While the chocolate is still soft, sprinkle your choice of chopped nuts and shredded coconut on top. This adds great flavor and a fun crunch.
Setting the Chocolate
After all the slices are coated, put the baking sheet in the refrigerator. Let the chocolate set for about 30 minutes. You want the chocolate to feel firm to the touch. Once set, gently peel the apple slices off the parchment paper. Be careful to keep the toppings intact. Enjoy your beautiful and tasty chocolate-covered apple slices!
Tips & Tricks
Best Practices for Melting Chocolate
To melt chocolate well, use a microwave-safe bowl. Combine chocolate chips and coconut oil. Heat it in short bursts, about 30 seconds each. After each burst, stir the mix. This helps the chocolate melt evenly. Avoid overheating, as it can make the chocolate grainy.
How to Achieve Even Coating
When dipping the apple slices, fully submerge them in the melted chocolate. Let the excess chocolate drip back into the bowl. This way, you get a nice, even coat. If you want extra toppings, sprinkle them on while the chocolate is still soft. This helps them stick better.
Serving and Presentation Suggestions
For a beautiful display, place the slices on a nice platter. Drizzle leftover melted chocolate over the slices in a zigzag pattern. This adds flair and looks fun. A light sprinkle of sea salt on top gives a nice touch. It enhances the flavor and makes it look fancy. Enjoy your snack!
Pro Tips
- Choose the Right Apples: Select apples that are crisp and firm to ensure they hold up well when dipped in chocolate.
- Chocolate Melting Technique: Stir the chocolate and coconut oil mixture every 30 seconds to prevent overheating and ensure a smooth melt.
- Garnish Variety: Experiment with different toppings like crushed freeze-dried fruits or sprinkles for a fun twist.
- Serving Suggestions: Serve these apple slices chilled for the best texture and flavor, especially on warm days.
Variations
Different Types of Chocolate (Milk, White, Vegan)
You can choose different types of chocolate for your apple slices. Milk chocolate makes a sweet treat. It pairs well with tart apples like Granny Smith. White chocolate adds a creamy touch. It is great for kids and those who love sweet flavors. If you want a dairy-free option, use vegan chocolate. It melts well and tastes great. Each type of chocolate gives a unique flavor and feel.
Alternative Toppings (Sprinkles, Spices)
You can get creative with toppings! Sprinkles add color and fun. Kids love them. You can also try spices for a kick. Cinnamon or nutmeg can make your slices special. Chopped nuts add crunch. They give a nice contrast to the soft apple. Feel free to mix and match your toppings. This way, every bite is a new surprise.
Incorporating Dipping Sauces
Dipping sauces can take your apple slices to the next level. You can serve caramel sauce for a classic touch. It adds sweetness that many enjoy. Peanut butter is another great choice. It adds richness and protein. You can even drizzle chocolate sauce over the slices. This makes every bite even more delicious. Try using different sauces based on your mood or season. This keeps your snacks exciting!
Storage Info
Proper Ways to Store Leftovers
To store your chocolate-covered apple slices, place them in an airtight container. Make sure each slice is separated by parchment paper. This prevents them from sticking together. You can stack them, but add paper between layers. Keep the container in the fridge to keep them fresh.
Shelf Life & Freshness Tips
Chocolate-covered apple slices last about 3 to 5 days in the fridge. After this time, the apples may become soft. For the best taste, enjoy them within the first couple of days. If you notice any browning on the apples, it’s time to toss them out.
Reheating Instructions
You don’t need to reheat chocolate-covered apple slices. They taste best cold. If you want to warm them, use a microwave. Heat them for just a few seconds. Be careful not to melt the chocolate again. Enjoy them chilled for a crunchy, sweet snack!
FAQs
Can I use other fruits instead of apples?
Yes, you can use other fruits. Strawberries, bananas, and pears work well. Each fruit adds its own flavor. Just remember to slice them for dipping. The chocolate will coat them nicely.
What are the health benefits of chocolate-covered apple slices?
Chocolate-covered apple slices offer several health benefits. Apples are rich in fiber and vitamins. Dark chocolate adds antioxidants. These snacks can satisfy your sweet tooth while providing nutrients. The nuts and coconut add healthy fats too.
Where can I purchase pre-made chocolate-covered apple slices?
You can find pre-made chocolate-covered apple slices at many stores. Look in the snack or dessert section. You may also find them at specialty shops. Online retailers offer a variety of options too.
How do I make these chocolate-covered apple slices kid-friendly?
To make chocolate-covered apple slices kid-friendly, use fun toppings. Try sprinkles or mini chocolate chips. You can also serve them on colorful plates. Let kids help dip and decorate their slices for fun.
You learned how to make tasty chocolate-covered apple slices. We covered choosing the right apples and optional garnishes. I shared step-by-step instructions, tips for melting chocolate, and serving ideas.
Remember, there are many ways to customize these treats with different chocolates and toppings. Store any leftovers properly for the best taste. Enjoy experimenting with your favorite fruits and treats. This fun recipe will impress family and friends every tim