Get ready to elevate your snack game with my easy and flavorful cheesy garlic breadsticks recipe! In just a few simple steps, you can create warm, gooey, and cheesy treats perfect for any occasion. Whether you crave a tasty appetizer or a side for pasta night, these breadsticks will never disappoint. Let’s dive into making these delicious bites that are sure to impress your family and friends!
Why I Love This Recipe
- Easy to Make: This recipe requires simple ingredients and straightforward steps, making it accessible for both novice and experienced bakers.
- Deliciously Cheesy: The combination of mozzarella and Parmesan creates a rich, cheesy flavor that everyone loves.
- Garlic Goodness: The addition of garlic powder adds an aromatic and savory kick, elevating the overall taste of the breadsticks.
- Perfect for Sharing: These breadsticks are ideal for parties and gatherings, making them a hit for sharing with family and friends.
Ingredients
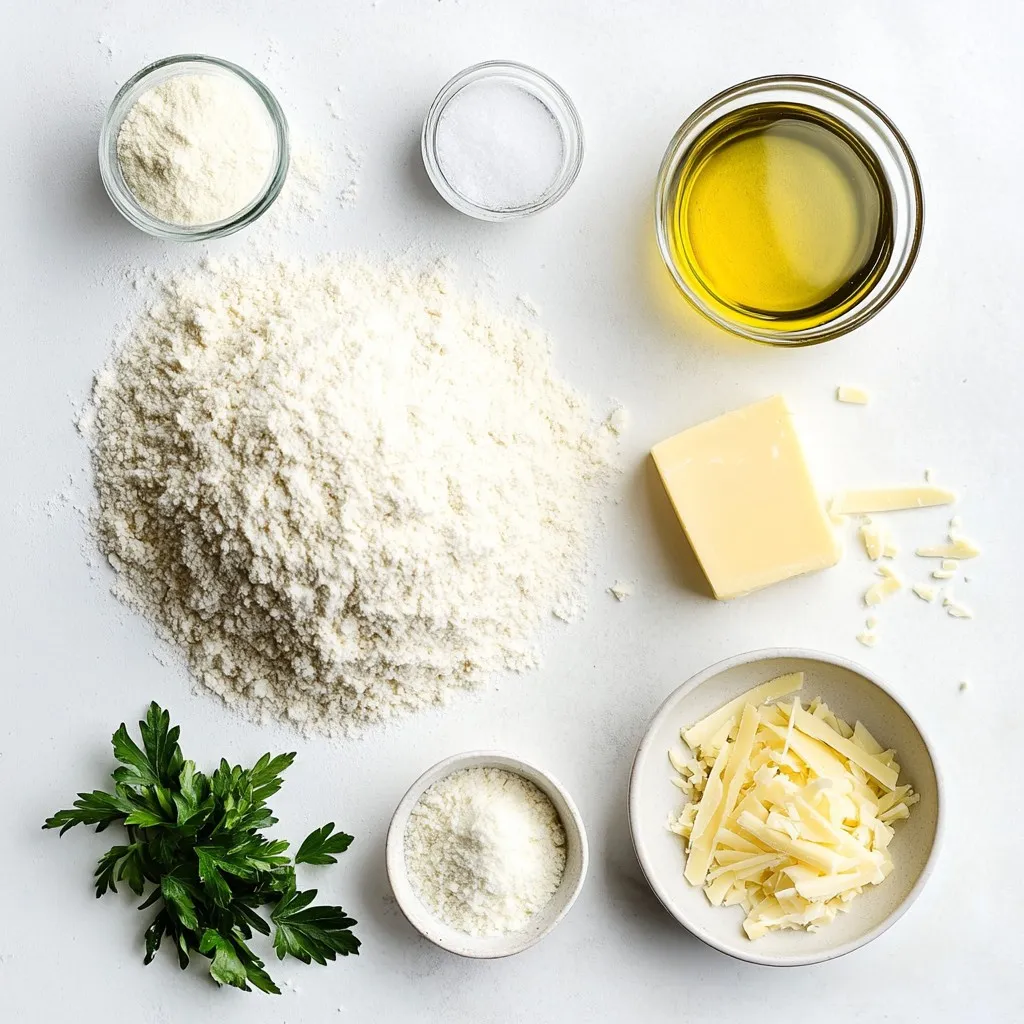
List of Ingredients
– 2 cups all-purpose flour
– 1 teaspoon active dry yeast
– 1 teaspoon granulated sugar
– 1 teaspoon fine sea salt
– 3/4 cup warm water
– 2 tablespoons extra virgin olive oil
– 1 teaspoon garlic powder
– 1 cup shredded mozzarella cheese
– 1/4 cup grated Parmesan cheese
– Fresh parsley (for garnish)
– 1 tablespoon unsalted butter (melted)
For this cheesy garlic breadstick recipe, you need simple ingredients. Each one plays a key role. The flour gives the breadsticks their base. Yeast helps the dough rise and become fluffy. Sugar feeds the yeast, making it active. Sea salt adds flavor, while warm water helps mix everything smoothly.
Olive oil adds richness and moisture. Garlic powder gives that garlicky kick we all love. Mozzarella is the star cheese, making it stretchy and melty. Parmesan adds a nice salty bite. Finally, fresh parsley brightens up the dish when you sprinkle it on top.
Gather these ingredients before you start. Having everything ready makes cooking easier and more fun. Plus, it sets you up for making yummy, cheesy garlic breadsticks everyone will enjoy!
Step-by-Step Instructions
Preparing the Yeast Mixture
First, grab a small bowl. Combine 3/4 cup of warm water with 1 teaspoon of granulated sugar and 1 teaspoon of active dry yeast. Stir gently and let it sit for about 5 minutes. You want to see bubbles and foam. This means your yeast is active and ready to go.
Making the Dough
Next, take a large mixing bowl and sift together 2 cups of all-purpose flour and 1 teaspoon of fine sea salt. Make a well in the center of the flour. Pour in the frothy yeast mixture along with 2 tablespoons of extra virgin olive oil. Mix it with a wooden spoon until a soft dough forms.
Now, transfer the dough to a lightly floured surface. Knead it for about 5 to 7 minutes. You want the dough to feel smooth and elastic, not sticky.
Rising and Baking
After kneading, place the dough in a greased bowl. Cover it with a damp kitchen towel. Let it rise in a warm spot for about 1 hour, or until it doubles in size.
While the dough rises, preheat your oven to 400°F (200°C). Once the dough has risen, gently punch it down. Roll it out on a floured surface into a rectangle, about 1/2 inch thick.
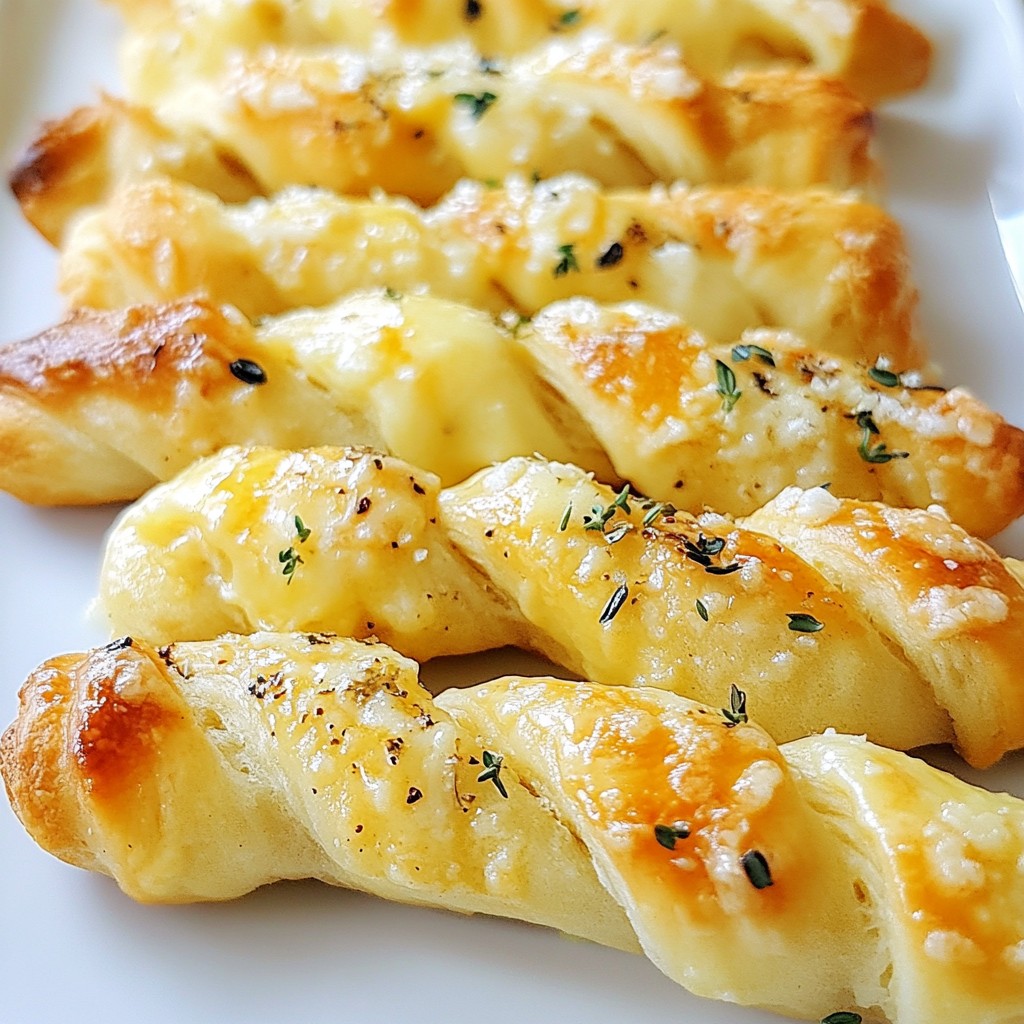
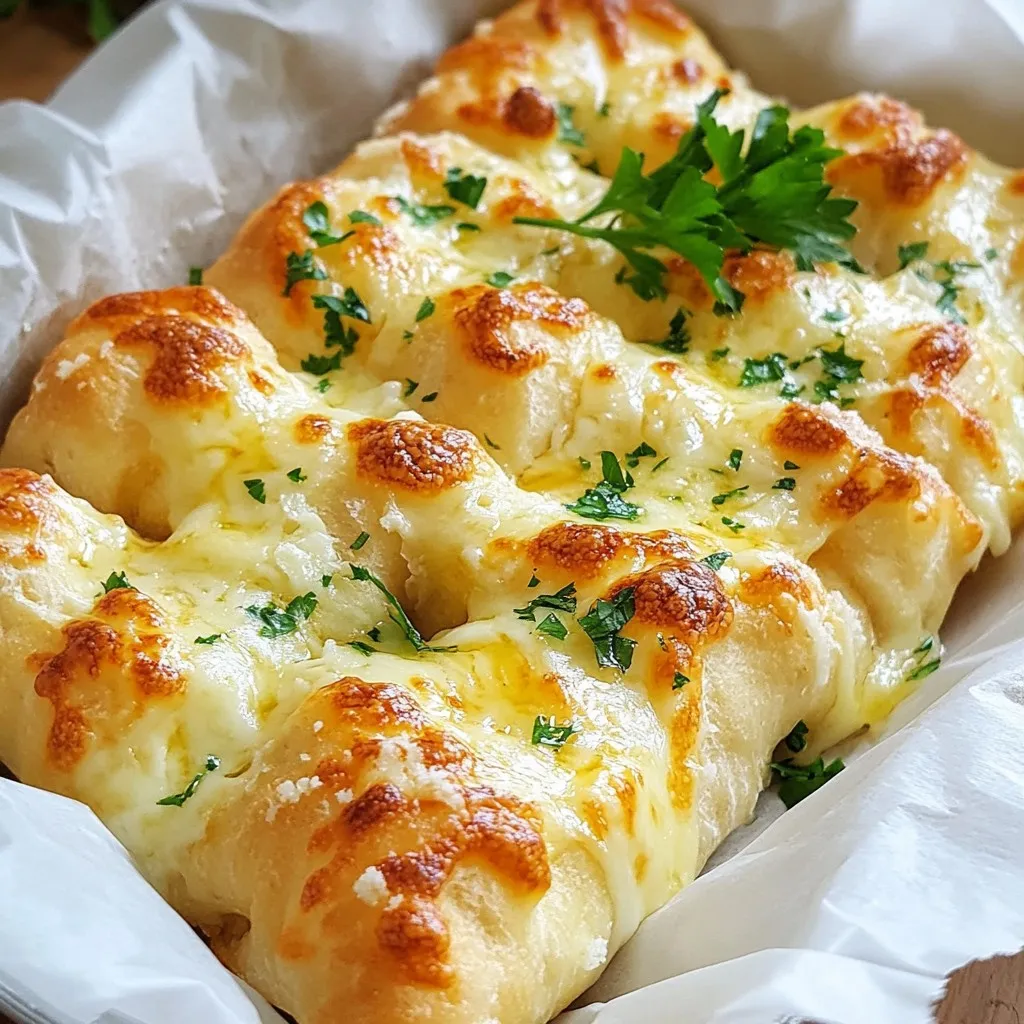
Carefully transfer the rolled dough to a greased baking sheet. Use a pizza cutter to cut it into strips. Brush melted butter over the dough, then sprinkle 1 teaspoon of garlic powder on top.
Add 1 cup of shredded mozzarella cheese and 1/4 cup of grated Parmesan cheese across the strips. Bake in the oven for 12 to 15 minutes. Look for golden edges and bubbly cheese.
Once done, remove the pan from the oven. Sprinkle with freshly chopped parsley for a pop of color. Let the breadsticks cool for a few minutes before you dive in!
Tips & Tricks
Perfecting the Dough
Kneading the dough is key. It helps develop the gluten, making breadsticks soft and chewy. Knead for about 5-7 minutes. You want the dough to feel smooth and elastic.
For the best rise, find a warm spot. An oven with just the light on works well. A warm kitchen counter is also good. Cover the dough with a damp towel to keep it from drying out.
Enhancing Flavor
If you want to switch it up, try fresh garlic instead of garlic powder. Mince a few cloves and mix them into the butter. It adds a bold taste.
You can also mix in different cheeses. Cheddar or gouda gives a nice twist. Feel free to experiment with your favorites for extra flavor.
Serving Suggestions
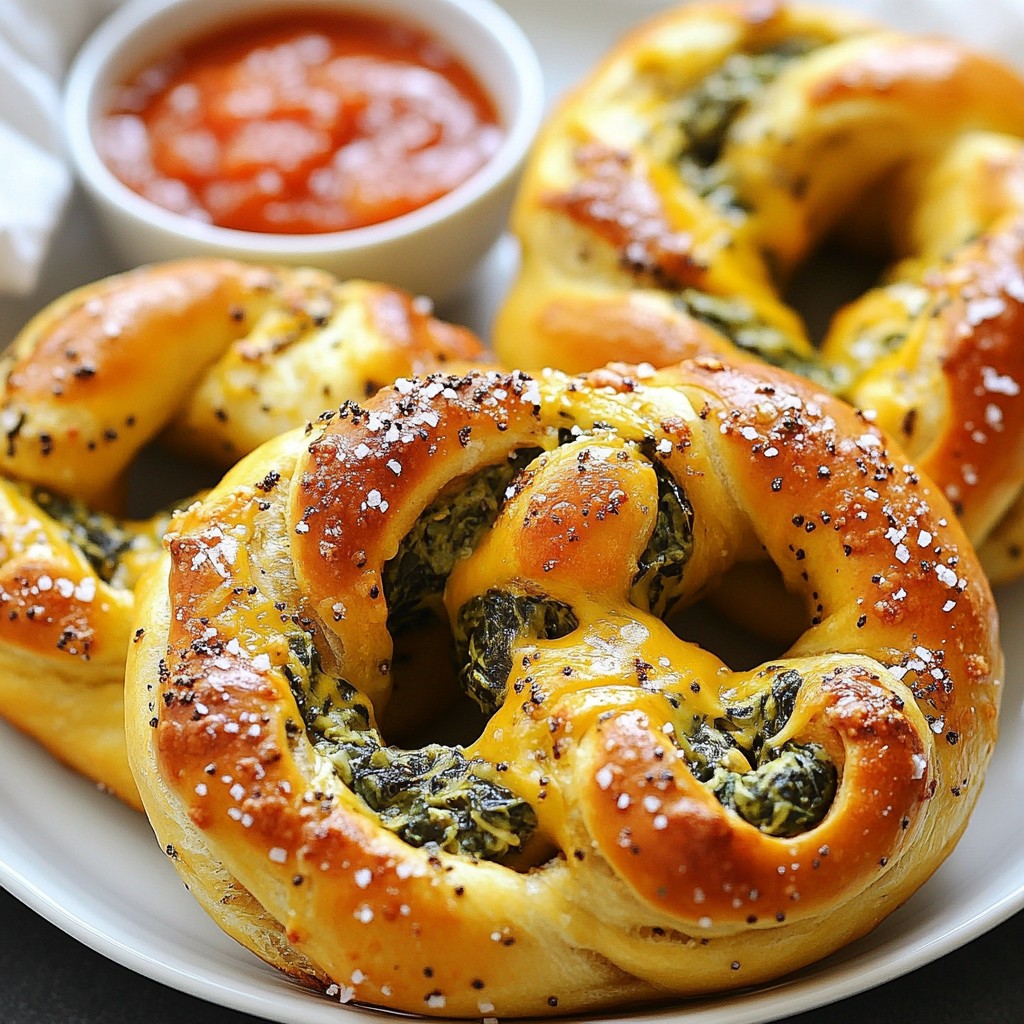
For a lovely presentation, place the breadsticks in a nice basket. Line it with parchment paper for a rustic look. Pair the breadsticks with marinara sauce for dipping. It adds a tasty touch.
Pro Tips
- Use Fresh Yeast: For the best rise and flavor, consider using fresh yeast if available. It can enhance the texture and taste of your breadsticks.
- Don’t Overwork the Dough: Knead the dough just until it becomes smooth and elastic. Over-kneading can result in tough breadsticks.
- Experiment with Toppings: Feel free to customize your breadsticks! Try adding herbs like oregano or thyme, or spices for an extra kick.
- Serve Immediately: These breadsticks are best enjoyed fresh from the oven. Serve them warm for optimal gooey cheese and flavor.
Variations
Herb-Infused Breadsticks
You can make herb-infused breadsticks by adding fresh herbs. Rosemary and thyme work great. These herbs add a nice flavor twist. You should adjust the garlic amount for balance. If you use more herbs, cut back on the garlic a bit. This way, the flavors blend well together.
Spicy Cheesy Breadsticks
Love a kick? Try spicy cheesy breadsticks! Add red pepper flakes for heat. Just a pinch gives it a nice zing. You can also mix in some chopped jalapeño. This adds a fresh and spicy taste. Be careful with the amount. You want a nice spice without overpowering the cheese.
Gluten-Free Option
Want a gluten-free option? You can use gluten-free all-purpose flour. This makes it safe for those with gluten issues. You may need to adjust your yeast. Some gluten-free flours don’t rise as well. Be sure to check the package instructions. This way, your breadsticks will still turn out tasty and fluffy.
Storage Info
Short-Term Storage
To keep your breadsticks fresh for one day, store them in an airtight container. This helps prevent them from drying out. If you don’t have a container, wrap them in plastic wrap. This will also keep them soft and tasty.
Long-Term Storage
You can freeze both baked and unbaked breadsticks. For baked ones, let them cool first. Then, wrap each stick in plastic wrap, and place them in a freezer bag. For unbaked breadsticks, freeze them on a baking sheet for an hour first. After that, transfer them to a freezer bag.
To reheat baked breadsticks from frozen, preheat your oven to 350°F. Bake for about 10-15 minutes, or until warm. If you have unbaked breadsticks, bake them from frozen for 15-20 minutes until golden.
Shelf Life
Breadsticks last about two days at room temperature if stored correctly. Keep them in a cool, dry place. If they start to feel hard, they may be stale. Signs of staleness include a dry texture and a less fragrant smell.
FAQs
How do I make cheesy garlic breadsticks without yeast?
You can skip the yeast by using baking powder instead. For a quick dough, mix all-purpose flour, baking powder, salt, and a bit of oil. Add water until you form a soft dough. Then, roll it out and top it with cheese and garlic. This method gives you fast and fluffy breadsticks.
Can I use other types of cheese?
Yes! You can use cheddar, gouda, or feta for a different taste. Each cheese adds its own flavor. Mixing cheeses can create a fun twist. Just make sure to use a cheese that melts well, so you get that gooey texture.
What is the best way to reheat leftover cheesy garlic breadsticks?
To reheat, place the breadsticks in a preheated oven at 350°F (175°C). Bake for about 5 minutes. This restores crispiness and warms the cheese. You can also use a toaster oven for a quick fix. Avoid the microwave, as it makes them soggy.
How can I make cheesy garlic breadsticks ahead of time?
You can prepare the dough and freeze it before baking. Just roll it out and cut it into strips. Place them on a baking sheet and freeze until solid. Then, transfer the strips to a bag. When you’re ready, bake them from frozen, adding a few extra minutes to the time.
Are cheesy garlic breadsticks vegetarian?
Yes! The ingredients in cheesy garlic breadsticks are vegetarian-friendly. Flour, cheese, and garlic are all plant-based. Just check any added toppings or sauces to ensure they fit your diet. Enjoy these tasty treats without worry!
This blog post covered how to make cheesy garlic breadsticks from scratch. We explored each ingredient, the step-by-step process, and storage tips. You can make delicious variations to suit your taste. Remember to knead properly and choose the right herbs for flavor. These breadsticks can elevate any meal, whether for a feast or a snack. Enjoy your cooking and let your creativity shine in the kitche